
Rosemary is a fragrant and versatile herb that adds a delightful flavor to a wide variety of dishes. Whether you’re a seasoned gardener or a novice with a green thumb, growing rosemary from store-bought rosemary can be a rewarding experience. Not only will you have a fresh supply of this aromatic herb at your fingertips, but you’ll also save money and reduce waste. In this article, we’ll guide you through the step-by-step process of growing rosemary from store-bought rosemary, ensuring your success in nurturing this versatile herb.
Choosing the Right Store-Bought Rosemary:
To begin your journey of growing rosemary at home, you need to select the right starting point – a healthy store-bought rosemary plant. When shopping for store-bought rosemary, look for plants that are vibrant, free from diseases, and have well-developed roots. Make sure the plant is free from yellowing leaves and has a robust, bushy appearance. The healthier the plant you choose, the better your chances of successful propagation.
Selecting the Right Container:

Once you have your store-bought rosemary, it’s time to prepare a suitable container for propagation. Rosemary can be grown in a variety of pots and containers, making it an excellent choice for indoor or outdoor gardening. Choose a pot with good drainage, as rosemary prefers well-drained soil and can be susceptible to root rot if overwatered. Terra cotta or clay pots are excellent choices because they allow for air circulation, which is essential for the plant’s roots.
Preparing the Potting Mix:
Rosemary thrives in well-drained soil that is slightly acidic. You can create the perfect potting mix by combining equal parts of regular potting soil and perlite or coarse sand. This mix ensures the right balance between moisture retention and drainage, preventing waterlogged roots. Fill your chosen container with this potting mix, leaving a few inches at the top for your rosemary plant.
Transplanting the Store-Bought Rosemary:
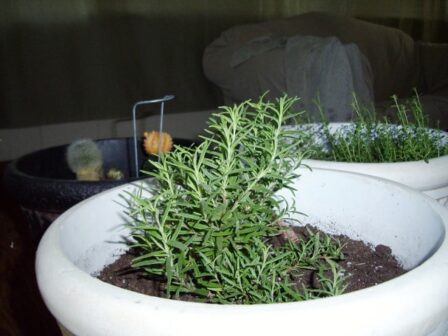
Carefully remove the store-bought rosemary from its original container. Gently shake off excess soil from the roots, being careful not to damage them. Place the rosemary plant in the center of your prepared pot, ensuring that the crown of the plant is level with the top of the potting mix. Fill in any empty spaces with more potting mix and lightly pat it down to secure the plant. Water the newly transplanted rosemary to help it settle into its new home.
Providing the Right Growing Conditions:
Rosemary is a sun-loving herb and requires at least 6-8 hours of direct sunlight each day. If you’re growing it indoors, place your potted rosemary near a sunny windowsill or use a grow light to ensure it receives adequate light. Maintaining a temperature range of 65-75°F (18-24°C) is ideal for rosemary’s growth.
Watering Your Rosemary:
Rosemary prefers slightly dry conditions, so it’s important not to overwater the plant. Allow the top inch of the potting mix to dry out before watering. When you do water, ensure that it’s a thorough, deep watering, allowing water to reach the root zone. Make sure your pot has good drainage to prevent excess moisture from accumulating at the bottom, which could lead to root rot.
Pruning and Pinching:
To encourage a bushy and well-branched rosemary plant, you should regularly prune and pinch the stems. When your rosemary has grown to about 6 inches in height, prune the tips of the branches to promote branching and create a fuller plant. This process also prevents the plant from becoming leggy.
Fertilizing:
Rosemary doesn’t require frequent feeding. You can fertilize your plant with a balanced, water-soluble fertilizer once every 4-6 weeks during the growing season (spring and summer). Be cautious not to over-fertilize, as excessive nutrients can negatively affect the flavor of the rosemary.
Pest and Disease Management:
Rosemary is generally a hardy herb, but it can still be susceptible to certain pests and diseases. Keep an eye out for common issues like powdery mildew, aphids, and spider mites. To prevent these problems, ensure good air circulation around the plant, maintain proper watering practices, and keep the plant free from dead or decaying leaves. You can also use neem oil or insecticidal soap to treat any infestations if they occur.
Harvesting Your Homegrown Rosemary:

After a few months of dedicated care, your homegrown rosemary will be ready for harvest. It’s best to wait until the plant has reached a reasonable size, typically around 6-8 inches in height, before you start snipping off sprigs. When you harvest, use sharp scissors or pruning shears to cut just above a leaf node, which will encourage new growth. You can harvest rosemary throughout the growing season, but it’s most flavorful before the plant blooms.
In conclusion, growing rosemary from store-bought rosemary is a rewarding and sustainable way to have a fresh supply of this versatile herb at your disposal. By following these step-by-step instructions, you can successfully propagate and nurture your rosemary plant, ensuring a bountiful harvest of aromatic leaves for your culinary delights. Enjoy the process of nurturing this fragrant herb and the delicious dishes it will enhance in your kitchen. Whether you’re a seasoned gardener or a beginner, growing rosemary from store-bought rosemary is an achievable and enjoyable endeavor that will add a delightful touch to your gardening experience.
Can you grow rosemary from dried rosemary leaves?
No, you cannot grow rosemary from dried rosemary leaves. To propagate rosemary, you need a live, healthy rosemary plant or cutting with viable stems and roots. Dried rosemary leaves lack the necessary living tissue to sprout and develop into a new plant.
YOU MAY LIKE: