
Sweet potatoes are not only a delicious and nutritious addition to your meals but can also be a rewarding crop to grow at home. While many might think that starting a sweet potato patch requires special skills or equipment, the truth is that you can easily grow sweet potatoes from store-bought tubers. This article will guide you through the process, from selecting the right sweet potatoes to harvesting your homegrown bounty.
Selecting the Right Sweet Potatoes:
The first step in growing sweet potatoes at home is to choose the right tubers. Opt for organic sweet potatoes from the grocery store, as they are less likely to be treated with growth inhibitors. Look for ones that are firm, free from blemishes, and have “eyes” or small sprouts. These sprouts indicate that the sweet potato is ready to grow.
Preparing the Sweet Potatoes:
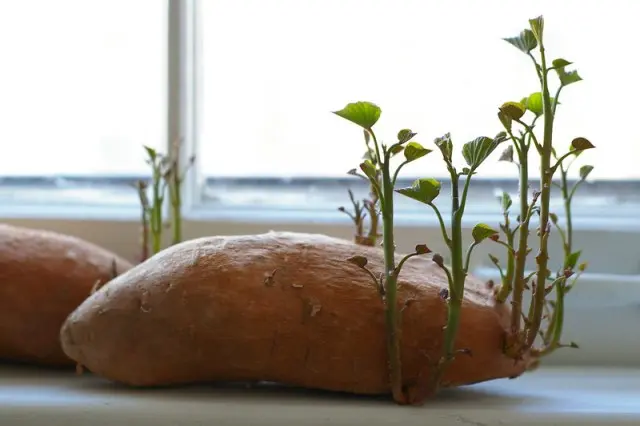
Before planting, sweet potatoes need a curing process to encourage sprouting. This involves placing the sweet potatoes in a warm, humid environment for a few weeks. You can achieve this by placing the sweet potatoes in a cardboard box or a container with moistened sand, peat moss, or vermiculite. Keep the box in a warm area with temperatures around 75-80°F (24-27°C). The humidity will encourage the development of sprouts.
Once the sprouts are about 3-4 inches long, carefully remove them from the sweet potatoes. Twist or snap them off gently, ensuring that each sprout has a small piece of the sweet potato attached.
Preparing the Planting Site:
Sweet potatoes thrive in well-draining, loose soil with a slightly acidic to neutral pH (around 5.8-6.2). Choose a sunny location for your sweet potato patch, as they require at least six hours of sunlight daily. If your soil is heavy clay, consider amending it with organic matter such as compost to improve drainage.
Planting the Sweet Potato Slips:
Now that you have your sprouts, it’s time to plant them. Create furrows or mounds in the soil, spacing them about 3 feet apart. Plant each sweet potato slip about 12-18 inches apart, burying them halfway into the soil. Ensure that the sprouts are facing upward and the attached sweet potato piece is covered with soil.
Watering and Mulching:
Water your sweet potato slips regularly, keeping the soil consistently moist but not waterlogged. Mulch the plants to conserve moisture, suppress weeds, and regulate soil temperature. Organic mulches like straw or shredded leaves work well for sweet potatoes.
Fertilizing:
Sweet potatoes are relatively low-maintenance, but they benefit from a balanced fertilizer application. A 5-10-10 fertilizer is suitable for sweet potatoes. Apply it when planting and again when the vines start spreading. Follow the recommended application rates on the fertilizer packaging.
Vine Maintenance:
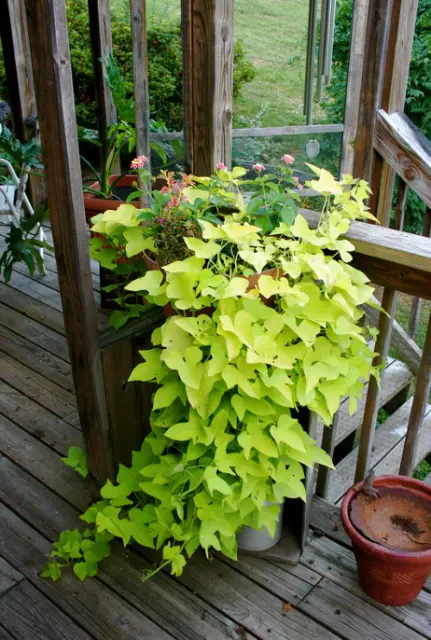
Sweet potato plants produce sprawling vines that can cover a significant area. While the vines help suppress weeds, they can also take up space. To manage the growth, you can gently guide the vines to spread in the desired direction or trim them back if they become too unruly.
Harvesting:
The time to harvest sweet potatoes typically arrives when the leaves start to yellow and die back, usually around 90 to 120 days after planting. Use a fork or shovel to carefully dig up the sweet potatoes, being cautious not to damage the tubers. Harvest on a dry day to prevent excess soil clinging to the potatoes.
Curing and Storing:
After harvesting, sweet potatoes benefit from a curing process to improve their flavor and texture. Cure them by placing the freshly dug sweet potatoes in a warm, humid environment (80-85°F or 27-29°C) for 10-14 days. Once cured, store the sweet potatoes in a cool, dark place with good ventilation. Properly cured and stored sweet potatoes can last for several months.
Common Issues and Troubleshooting:
- Pests: Keep an eye out for pests like sweet potato weevils and aphids. Insecticidal soap or neem oil can be used for organic pest control.
- Diseases: Prevent fungal diseases by providing adequate spacing between plants and ensuring good air circulation. Rotate your sweet potato crop every few years to minimize disease pressure.
- Cracked Potatoes: Irregular watering, especially during the growing season, can lead to cracked sweet potatoes. Maintain consistent moisture to prevent this issue.
Conclusion:
Growing sweet potatoes from store-bought tubers is a gratifying experience that doesn’t require advanced gardening skills. With the right selection, preparation, and care, you can enjoy a bountiful harvest of homegrown sweet potatoes. From the humble beginnings of sprouting sweet potato slips to the joy of harvesting your own crop, this process allows you to connect with the earth and savor the fruits of your labor on the dinner table. Whether you’re a seasoned gardener or a novice, cultivating sweet potatoes at home is a journey worth taking.
MORE POSTS: