
Are you fond of sponge gourds? Ever thought of growing one in your home farm? But isn’t it a good idea? A place where you can grow your organic sponge gourd plant. Also, use it freshly in your curries, gravies and stews? Well, for those who are unfamiliar with sponge gourds. It is a type of vegetable that grows on long vines. Basically belongs to the cucumber family and is fondly known as Loofah Sponge Gourd. Let me give you detailed information on how to grow sponge gourd from seeds.
Sowing Method of Sponge Gourd Seeds
Take a pot with proper drainage holes. This will allow the nutrients and water to seep in. Secondly, fill the pot accordance to the potting layers. Sow the seeds in the pot and place them 2 cm deep in the soil. Make sure that the soil temperature is around 10 to 40 degrees Celsius. The reason is that good soil enables a better yield.
Surround the seed with soil by slightly pushing the seed slowly with your finger in the middle. Water the sown seeds with a watering can after immediate planting to set the soil firmly. The water pressure must be a light shower.

Growth Stages of the Sponge Gourd
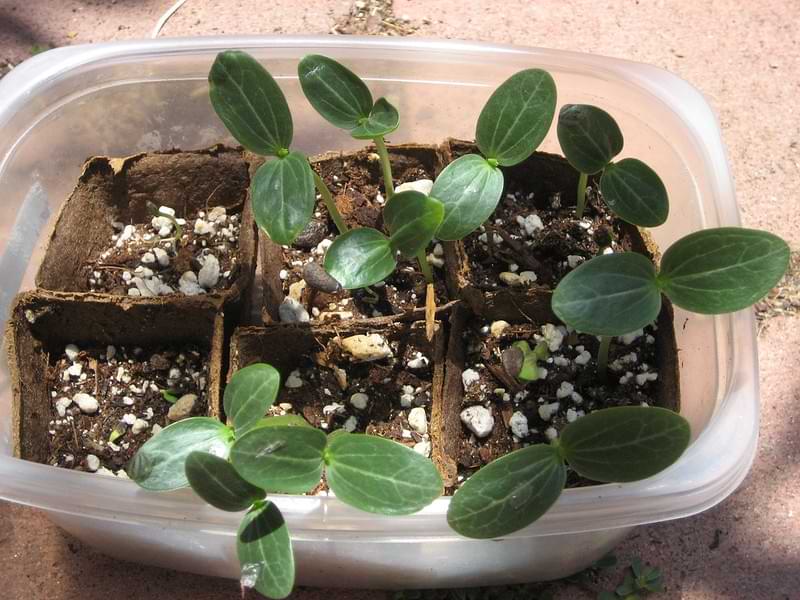
During the first stage, within a time span of 6-8 days, the seeds will begin to germinate. You will be able to notice tiny sprouts emerging from the soil. Then arrives the next stage, where the first 2 leaves will show up during the second week. These leaves are termed as cotyledons. Then comes the time when the first leaves will emerge above the cotyledons. This happens at the end of the second week. Seedling is the second-to-last stage. In this stage, seedlings start growing into small plants. The last stage depicts thinning. Manual stage where one needs to make sure to place only one seedling at a single spot. Let go of the weak seedlings. Use scissors. These are the initial steps on how to grow sponge gourd plants from seeds at home.
Aftercare treatment
Sponge Gourd needs immense sunlight for its growth. Place it directly under bright sunlight. Next, the sponge gourd will require plenty of water for its survival. Avoid using pipes; instead, use a watering can to let water seep in in the form of a light shower. Another method is to supply water to your raised beds through the drip irrigation method.
Build a strong support. Ensure the height of the support is around 5 to 6 feet. We all know that sponge gourd grows very fast. Hence, it requires a lot of space to do so. Use materials like bamboo, ropes, wires and pipes that are locally available in the market. Next comes manuring. Keep in mind that this step must be done before sowing seeds. Don’t be a miser while adding good quality of manure as it will promote better growth of your plant. Add compost in a 2:1 ratio. If you are unsure about what to add, try adding vermicompost, farm manure and even cow dung manure for pretty good growth.
Once the sponge gourd plant turns 45 days old, then make use of fertilisers in the ratio of 15:15:15. Use vermicompost or NPK fertiliser per plant. Just like the way you care for a newborn and check for infections same way plants also need to be taken care of. This can even be life-threatening to the plants. Spray organic insecticides and pesticides on the loffah plants. Keep an eye on powdered spots known as mildew, as it can affect young baby plants. Germination of flowers is often done by birds; likewise, we as humans can also contribute to the germinal stage. Take a few pollen grains of the male plant on a piece of cotton bud and dust them slowly into the Stigma of the female. Though the step is not crucial, you can carry it out if you want to produce more sponge gourd plants in future.
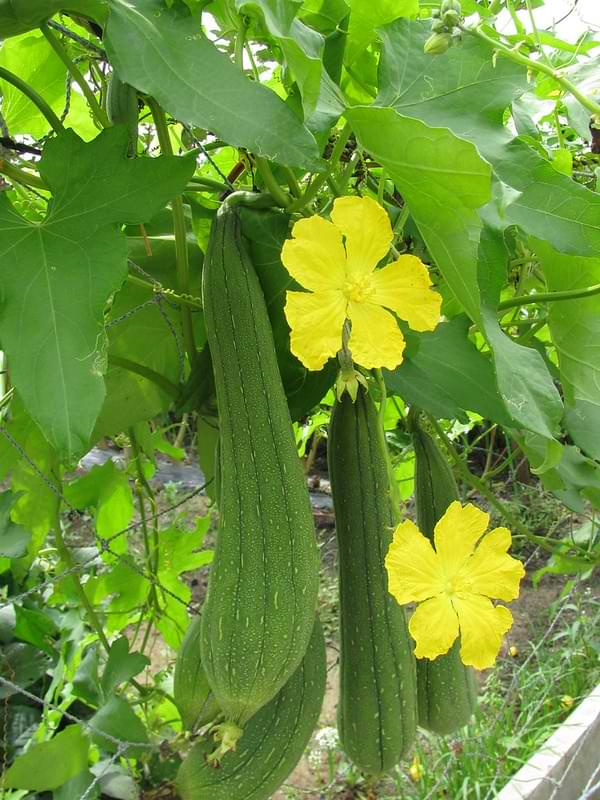
Now comes the last stage of aftercare, i.e Harvesting stage. Sponge gourd will start the flowering process by the end of the third month of sowing seeds. This stage will take place 80 to 90 days after sowing the seeds. Thus, you can start harvesting the ripe sponge gourd after the 3rd month, and it will continue for about the next three months as well.
Additional Tips for Elevated Creativity
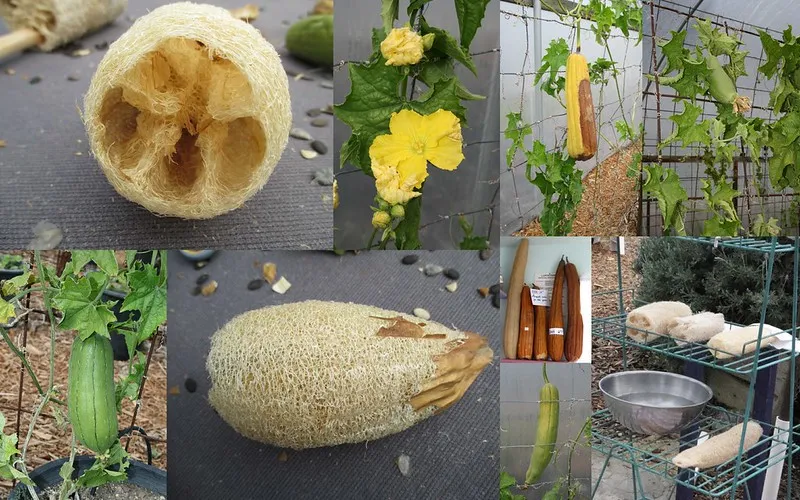
Luffa plants (sponge gourd) grow into beautiful yellow flowers when pollinated. After pollinating, the plants grow quickly. If you wish to grow luffa in your kitchen, bath or for craft sponges, then leave it to grow bigger in size. The bigger the vegetable, the more fibrous it becomes. Wait until it is dry and brown to make the most of it.
Tips for people staying in short summer areas
For people with long summers, they can easily grow the sponge gourds in their farmyards. But the question arises for those who stay in regions with short summers. So here is a tip I would like to share with all. Try growing the sponge gourd plant indoors. Complete the process before winters arrive. Try growing the plant under grow lights. Also, dry them in indoor areas where there is a lot of space and better ventilation.
Grow organic sponge gourds at home! Learn sowing, care, harvesting, and even how to make loofah sponges from your plants.
MORE POSTS: How to grow chayote squash at home?